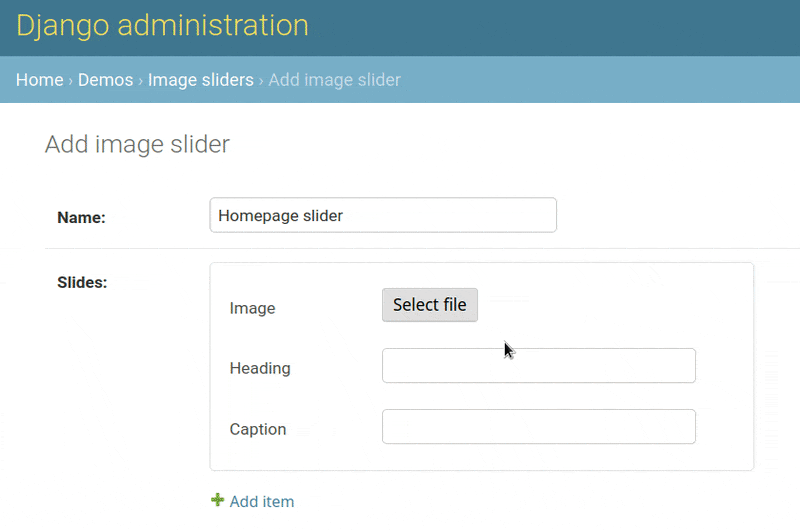
Uploading files
For uploading files, use the string type along with the format keyword.
There are two ways to keep files in a JSON data:
Base64 string - the file will be encoded as Base64 string and all the data will be kept within the JSON object.
File URL - the file will be uploaded on the server and only the URL of the file will be kept in the JSON object.
Base64 string
This option is ideal for keeping small file data within a JSON object.
It is quick and easy to setup. Just by declaring the format keyword, you’re
good to go.
But this convenience comes with two tradeoffs: Base64 encoded data will be 33% larger than the original file. Second, Base64 images and files won’t be cached by the browsers unlike other images accessed via urls. For small files, these tradeoffs shouldn’t really matter.
The type should be string and format should be 'data-url':
# Schema
{
    'type': 'object',
    'keys': {
        'logo': {'type': 'string', 'format': 'data-url'}
    }
}

# Output data
{
    'logo': 'data:image/png;base64,<long-base64-encoded-data>'
}
File URL
This option is ideal for “uploading” large files in JSON data. However, it requires a little more work to set up.
The file will be saved on the server and only a reference (such as a path or a url) to the file is kept in the JSON data.
Features:
Listing existing files from the server (Since version 2.11).
Deleting files (Since version 2.12).
Tip
By default, the file-url field will display a button which opens a modal
for uploading and choosing files. If you prefer a simple file input without extra
features, see Overriding the file input for details.
In the schema, the type should be string and format should be
'file-url':
# Schema
{
    'type': 'object',
    'keys': {
        'logo': {'type': 'string', 'format': 'file-url'}
    }
}

# Output data
{
    'logo': 'path/to/logo.png'
}
File handler view
Since uploading files or listing existing files requires interaction with the server, you are required to create a view for handling upload and list requests.
This view will be responsible for these three things:
If request method is
POST, save files on the server.If request method is
GET, return a list of available files for the user to choose from.If request method is
DELETE, delete the file.
Before diving into details, let’s look at the handler view at a basic level:
Following is a basic outline of the handler view. For working code examples, see Handling file uploads section and Returning a list of available files section.
# Basic file handler view

from django.contrib.auth.decorators import login_required

@login_required
def file_handler_view(request):
    if request.method == 'POST':
        # save uploaded file
        ...
    elif request.method == 'GET':
        # return available files for choosing
        ...
    elif request.method == 'DELETE':
        # delete files
        ...
Setting things up
First, create a URL for your view:
# myapp/urls.py

from django.urls import path

urlpatterns = [
    # ...
    path('json-file-handler/', myapp.views.file_handler_view),
    # ...
]
You can create as many handler views as you like. For example, one separate view for each JSONfield, or one common view for all fields.
Next, you have to tell django-jsonform which handler view to call. There are three ways to do that:
By passing the URL through
file_handlerargument to theJSONField;Or by using the
FILE_HANDLERsetting to declare one common handler for all JSONFields;Or by using the
handlerkeyword in the schema to specify a separate view for each file input.
Option 1: Using the FILE_HANDLER setting
This option is great for declaring one common handler view for all JSONField
instances.
# settings.py

DJANGO_JSONFORM = {
    'FILE_HANDLER': '/json-file-handler/'
}
Option 2: Using the file_handler argument
This option is great for declaring a handler for a particular JSONfield. This is
especially useful if you’re writing a reusable app.
This argument will override the FILE_HANDLER setting.
# models.py

from django.urls import reverse_lazy

class MyModel(...):
    data = JSONField(
        schema=...,

        file_handler='/json-file-handler/' # hard-coded URL

        # OR

        file_handler=reverse_lazy('name-of-url') # reversed URL
    )
To reverse the URL, you will have to use reverse_lazy function instead of
the regular reverse function because urls are loaded after models. Therefore,
using reverse will lead to an error.
Option 3: Using handler keyword in schema
This option is great for declaring separate handlers for separate fields within a schema.
This keyword will override the previous two options mentioned above.
# models.py

'image': {
    'type': 'string',
    'format': 'file-url',

    'handler': '/json-file-handler/' # hard-coded URL

    # OR

    'handler': reverse_lazy('json-file-handler') # reversed URL
}
Handling file uploads
Your file handler view will receive a POST request for uploading files.
Code example
In this example, we’ll save the file in a dedicated model called MediaModel,
but you are free to save your files however you want such as directly to the
filesystem, it’s up to you.
# views.py

from django.http import JsonResponse
from django.contrib.auth.decorators import login_required

@login_required
def file_handler(request):
    if request.method == 'POST':
        file = request.FILES['file']
        obj = MediaModel(file=file)
        obj.save()

        # return the path of the file
        # this value will be kept in the JSON data
        return JsonResponse({'value': obj.file.name})

    elif request.method == 'GET':
        # return available files for choosing
        ...
    elif request.method == 'DELETE':
        # delete files
        ...
Request arguments
Each POST request will also contain these additional arguments:
model_name: Name of the model.field_name: Name of the field.coords: Coordinates of the data input field. (See also:split_coords())
These arguments are useful for identifying the model and the field when you have one common handler for multiple JSON fields.
Response format
Your view must return a JsonResponse in this format:
JsonResponse({'value': 'path/to/uploaded-file.jpg'})
The value of the value variable will be saved in the JSON data.
Attention
It is recommended your file handler view should return the path of the uploaded file without the media url prefix.
The rationale behind it is that file’s url may change but file’s name and path doesn’t.
If you’re keeping the files in the media directory, the url of that file
will look like: /media/path/to/image.png.
But if later you wish to migrate your files to a third party service such as
AWS S3 bucket. Then the file’s url will be completely different:
https://s3-bucketname.amazonaws.com/path/to/image.png.
If you save the full url in the JSON data, then that value won’t be updated and still have the old url.
A better way is to just keep the path of the file and use Django’s
{% get_media_prefix %} tag in the templates to create the full url.
See Accessing files in templates section below for more.
Returning a list of available files
Your file handler view will receive a GET request for fetching the list of
available files.
Here’s an animated GIF of this feature:
Code Example
In the following code example we are sending files from the MediaModel we
used in the previous example:
# views.py

from django.http import JsonResponse
from django.contrib.auth.decorators import login_required

@login_required
def file_handler(request):
    if request.method == 'POST':
        # save uploaded file
        ...

    elif request.method == 'GET':
        page = int(request.GET.get('page', 1))

        files_per_page = 10

        start = (page - 1) * files_per_page
        end = start + files_per_page

        results = []

        for obj in MediaModel.objects.all()[start:end]:
            results.append({
                'value': obj.file.name,

                # optional data
                #
                # 'thumbnail': obj.file.url,
                # 'metadata': {
                #     'name': obj.file.name.split('/')[-1],
                #     'date_created': obj.created_on.strftime('%d %b, %Y'),
                #     'size': '%s KB' % (obj.file.size / 1000),
                # }
            })

        return JsonResponse({'results': results})

    elif request.method == 'DELETE':
        # delete files
        ...
Request arguments
Each GET request will also contain these arguments:
page: Page number. It’s up to you how many items you want to show per page.model_name: Name of the model.field_name: Name of the field.coords: Coordinates of the data input field. (See also:split_coords())
Response format
The view must return a JsonResponse in this format:
JsonResponse({
    'results': [
        {'value': 'path/to/file-1.jpg'}, # file 1
        {'value': 'path/to/file-2.jpg'}, # file 2
        ...
    ]
})
Each item in the results list must be a dict containing these keys:
value(string; required): The path of the file which will be saved in the JSON data.thumbnail(string; optional): Preview thumbnail of the file. If you don’t provide it, a file icon will be displayed to the user.metadata(dict; optional): This is a dict which can contain any keys about the file info, such as name, size, date, etc. Themetadatadict can contain any data you wish. All of that data will be displayed to the user under the file’s thumbnail.
Here are some examples of the results list:
# 1. Items with only file names

[
    {'value': 'path/to/file.jpg'}, # file 1
    {'value': 'path/to/file.jpg'}, # file 2
    ...
]

# 2. Items with thumbnails

[
    {'value': 'path/to/file.jpg', 'thumbnail': 'path/to/thumb.jpg',},
    ...
]

# 3. Items with metadata and file info

[
    {
        'value': 'path/to/file.jpg',
        'thumbnail': 'path/to/thubnail.jpg',
        'metadata': {
            'name': 'Name of image',
            'date': '01 Jan, 2022',
            'size': '100 KB',
        }

    },
    ...
]
Deleting files
New in version 2.12.
The file handler will receive DELETE requests for deleting files. It is left
up to you to delete the files. If you don’t want to delete any file, you can
just ignore all the DELETE requests.
The DELETE request are sent for the following events:
A user clicks the “Delete” button on an image thumbnail.
A user exits the page without saving the form.
Request arguments
Each DELETE request will contain these query parameters:
trigger: The event that triggered the file deletion.value: Name of the file to be deleted. This parameter can be present more than once if multiple files are to be deleted. Hence, treat it like a list.model_name: Name of the model.field_name: Name of the field.coords: Coordinates of the data input field. (See also:split_coords())
Available trigger values:
Trigger |
Description |
|---|---|
|
When “Delete” button is clicked. |
|
When user exits the page without saving the form. |
The trigger parameter helps you decide for which events you want to delete
the files and which events you want to ignore.
Response format
Return an empty response with appropriate status code:
200,202,204status codes for success.4xxstatus codes for error.
Code example
# views.py

from django.http import HttpResponse
from django.contrib.auth.decorators import login_required

@login_required
def file_handler(request):
    if request.method == 'POST':
        # save uploaded file
        ...

    elif request.method == 'GET':
        # return list of existing files
        ...

    elif request.method == 'DELETE':
        trigger = request.GET.get('trigger')
        file_names = request.GET.getlist('value')

        if trigger != 'delete_button':
            # if deletion is not triggered by Delete button,
            # exit the view
            return HttpResponse(status=200)

        for name in file_names:
            # ... delete files ...
            ...

        return HttpResponse(status=200) # success

        # OR

        return HttpResponse(status=403) # permission denied
Accessing files in templates
For data-url, you can just use the value as it is because all the file data
is saved in JSON as a Base64 encoded string.
For file url, you may want to prepend a media url prefix using Django’s
{% get_media_prefix %} tag (see Django docs).
Suppose the data looks like this:
# Sample data
data = {
    'image': 'path/to/image.png'
}
Then in the template, you’ll do something like this:
{% load static %}

<img src="{% get_media_prefix %}{{ data.image }}">
Overriding the file input
New in version 2.14.
By default, the file-url field will display a button which opens a modal
for uploading and choosing files.
If you don’t want to use those features and prefer a simple file input, you can
override that using the widget keyword:
'logo': {
    'type': 'string',
    'format': 'file-url',
    'widget': 'fileinput' # will create a simple file input
}